Twilight Photography Done Correctly
- Open.Tours
- Apr 27, 2017
- 2 min read
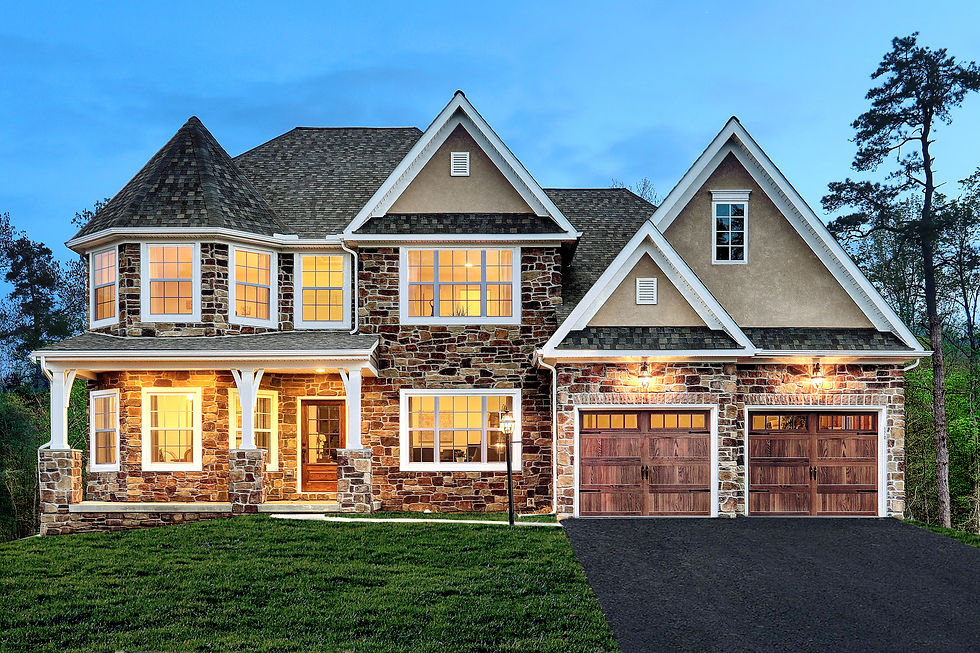
Last evening I captured imagery to create this Twilight Photo for a Keystone Custom Homes property in North East, MD. There are many styles of Twilight photography. My favorite is a layered technique, although it requires around an hour of time on site.

By capturing light from the building before sunset, I'm able to retain more of the color that is reflected off. After the light levels drop, you lose most of the natural color of the building. By taking some elements from different times you can combine them with fine-tuned techniques to create a beautiful final product.For this project I actually combined three different times. Time A + Time B to create one image. Then I combine that with a Time C after sunset where I use mostly the dark hues of the sky and the light from the windows. I blend in some other elements from raw exposures additionally as needed. If done correctly you should be able to see some detail through the windows. Overall the photo should convey a sense of being warmly welcomed home. This was a new build and grass has not grown yet and the driveway was a bit dirty so I did some extra fore-ground processing. The builder now has the ability to market this model style in a more appealing way.
There are more affordable options to convert daylight images to "Twilight", however I don't offer that option because I feel it looks un-appealing and too artificial. You can usually see harsh shadows being cast by the sun and because you can't replicate a light source coming from inside the home, you end up painting a false light over-top the windows. Many images I've seen done this way use too much orange or yellow glow and it feels more like a haunted house rather than a magical night.
Here are a couple of the source images I used when creating the final twilight photo seen above. Here you can see what the image looked like before changing the fore-ground with post-processing techniques.


Comments